

MAKEUP HACKS THAT WORK
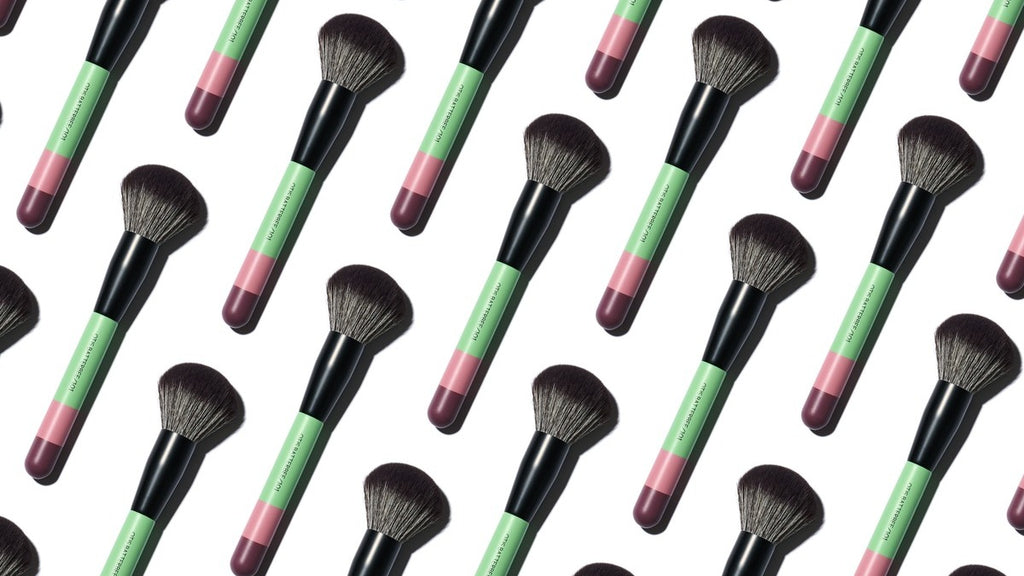
In the realm of beauty and makeup, innovation knows no bounds. Otis Batterbee's exquisite brush collection opens up a world of possibilities, offering not only precision in makeup application but also unlocking a realm of creative hacks to elevate your beauty routine. From achieving brow perfection with the angled brush to the artistry of faux freckles using a detailed eyeliner brush, each brush in Otis Batterbee's collection becomes a versatile tool in your makeup arsenal. Let's explore an array of beauty hacks, from contouring with a spoon to turning eyeshadow into eyeliner, all made possible with the finesse of Otis Batterbee's expertly crafted brushes!
Brow Perfection with an Angled Brush
- Brush: Otis Batterbee's Angled Detail Brush found in The Mini Eye Brush Set
- Hack: An angled brush isn't just for eyeliner. Use it with brow pomade or powder to define and fill in your eyebrows with precision. The angled shape helps create natural-looking hair strokes.
Additional Tips:
Brow Mapping with the Angled Brush
- Utilize the angled edge of the brush to map out your eyebrows before filling them in. Align the brush from the outer corner of your nose to the inner corner of your eye to determine where your brows should start. Then, angle it from the outer corner of your nose to the outer corner of your eye to find where your brows should end.
- Mimic the appearance of natural eyebrow hairs by using the angled brush to apply brow product in a feathering motion. Instead of solid lines, create short, upward strokes to emulate the look of real hair, especially in sparse areas.
Dual Use for Precision
- Use the pointed tip of the angled brush to define the tail of your eyebrows precisely. The fine point allows for intricate detailing, ensuring a polished and well-defined arch.
Gradual Build-Up
- Start with a small amount of product on the angled brush and gradually build up the intensity. This approach helps you achieve a more natural and blendable look, preventing overly harsh or blocky brows.
Set with Clear Brow Gel
- After filling in your eyebrows, use the spoolie end of the angled brush to comb through them. This not only helps distribute the product evenly but also sets your brows in place. For a polished finish, you can further set them with a clear brow gel.
Custom Brow Colour
- Mix different shades of brow powder or pomade on the back of your hand using the angled brush. This allows you to create a custom shade that matches your eyebrow colour perfectly.
Concealer Cleanup
- Dip the angled brush in a bit of concealer and use it to clean up the edges of your brows. This helps define the shape and gives a crisp, polished finish to your eyebrow look.

Use Concealer in a Triangle Shape
- Brush: Otis Batterbee's Concealer Brush Duo
- When applying concealer under your eyes, use a triangle shape with the base along your lower lash line. This brightens the under-eye area and also conceals any redness around the nose.
Additional Tips:
Precision with Dual Brushes
- The Concealer Brush Duo provides a versatile approach to concealer application. Use the larger, flat brush for applying concealer in broader areas, covering the triangle shape under your eyes. Then, switch to the smaller brush for more precise detailing, especially in the inner corners or around the nose.
Blend Seamlessly
- After applying concealer in the triangle shape, use the brushes to blend the product seamlessly into your skin. The duo allows for efficient blending, ensuring there are no harsh lines between the concealed areas and the rest of your complexion.
Extend the Triangle to Highlight
- Extend the triangle shape slightly beyond the lower lash line and onto the tops of your cheekbones. This technique not only conceals dark circles but also acts as a highlighter, bringing attention to the center of your face and creating a lifted, brightened effect.
Layering for Full Coverage
- If you need extra coverage, layering is key. Apply a thin layer of concealer using the larger brush, let it set for a moment, and then build up coverage as needed. The duo allows for a buildable application without cakiness.
Colour Correcting with Precision
- Use the smaller, tapered brush from the duo for precise colour correcting. Apply a peach or orange-toned concealer with this brush to neutralize any blue or purple undertones in the under-eye area before applying your regular concealer.
Concealing Redness Around the Nose
- The smaller brush is perfect for targeting specific areas, such as redness around the nose. Apply a small amount of concealer with precision to these areas and blend for a flawless finish.
Setting with Translucent Powder
- After concealer application, use the larger brush to set the concealed areas with a light dusting of translucent powder. This helps prevent creasing and ensures long-lasting coverage.
Multi-Functional Brushes
- These brushes can also be used for other purposes, such as applying eyeshadow primer or highlighting smaller areas like the Cupid's bow. Their versatility makes them valuable additions to your makeup toolkit.

Concealer Brush Cleanup
- Brush: Otis Batterbee’s Angled Detail Brush found in The Mini Eye Brush Set
- Hack: Clean up your winged eyeliner or lipstick edges with a small concealer brush. Dip it in concealer and use it to sharpen lines for a polished and defined look.
Additional Tips:
Precision with Angled Detail Brush
- The Angled Detail Brush is ideal for precision work, making it perfect for cleaning up any makeup mistakes. Its angled shape allows for accurate application and cleanup along the edges of winged eyeliner or lipstick.
Perfect Winged Eyeliner
- After applying your winged eyeliner, use the angled detail brush to dip into concealer. Trace along the edges of your winged liner to perfect and sharpen the lines. This not only cleans up any unevenness but also creates a crisp, defined wing.
Fix Lipstick Smudges
- If your lipstick application goes slightly beyond your lip line, the angled detail brush is your go-to tool. Dip it in concealer and carefully trace along the edges of your lips to clean up any smudges or uneven lines.
Blend Seamlessly
- After applying concealer to clean up the edges, use the brush to blend the concealer seamlessly into your foundation or skin. This ensures a flawless finish without any noticeable demarcation between the cleaned-up area and the rest of your makeup.
Conceal Blemishes with Precision
- The angled shape of the brush allows for precise concealer application, making it suitable for covering small blemishes or imperfections on your face. Dab the brush in concealer and pat it onto the targeted area for effective coverage.
Detailing Eyebrow Cleanup
- Use the angled detail brush to tidy up the edges of your eyebrows after filling them in. This helps create a clean and defined brow shape, and the brush's precision ensures you don’t disturb the filled-in areas.
Double-Ended Convenience
- If the Angled Detail Brush is double ended, take advantage of the other end for different makeup applications. For example, use the opposite end for detailed eyeshadow application or blending.
Clean the Brush Regularly
- To maintain the effectiveness of the brush, clean it regularly with a gentle brush cleaner or mild soap. This ensures that the bristles remain soft and the brush stays in good condition for precise makeup application.
Highlighter on Inner Corner of Eyes
- Brush: Otis Batterbee's Oval Shaped Brush found in the Professional Oval Makeup Brush Set
- Apply a touch of highlighter or a light, shimmery eyeshadow to the inner corners of your eyes to make them appear brighter and more awake.
Additional Tips:
Precise Application with Oval Brush
- The oval-shaped brush in the Professional Oval Makeup Brush Set is perfect for precise application. Use the rounded tip of the brush to pick up the highlighter or eyeshadow and gently apply it to the inner corners of your eyes.
Blend Outward for Gradient Effect
- After applying the highlighter, use the brush to blend the product slightly towards the center of your eyelid. This creates a subtle gradient effect, making the inner corners appear seamlessly brighter and more natural.
Dual Use for Brow Bone Highlight
- Utilize the same oval brush to apply a touch of highlighter or eyeshadow to your brow bone. The size and shape of the brush make it easy to highlight both the inner corners and the brow bone with precision.
Choose the Right Highlighter Shade
- Consider using a highlighter shade that complements your skin tone. For fair skin, champagne or light pink tones work well, while gold or peachy tones can enhance the inner corners for those with medium to deep skin tones.
Highlight Tear Duct Area
- Extend the highlighter application slightly towards the tear duct area for an added brightening effect. This technique enhances the overall openness of the eyes.
Wet Application for Intensity
- For a more intense inner corner highlight, dampen the oval-shaped brush slightly before picking up the highlighter. This technique can amp up the shimmer and make your eyes pop.
Set Lower Lash Line
- Use the same brush to apply a subtle amount of highlighter or eyeshadow along the lower lash line, starting from the inner corner and extending towards the center. This brightens the entire eye area.
Clean the Brush Between Colours
- If you're using different eyeshadow colours or highlighters, clean the brush between applications to avoid muddying the shades. This ensures that each colour is applied with precision and clarity.

DIY Contouring with a Spoon
- Use the edge of a spoon as a guide for contouring your cheeks. Place the handle against your cheekbone and apply contour powder or cream along the edge for a perfect contour line.
Additional Tips:
Choose the Right Spoon
- The size and curve of the spoon can affect your contouring results. A smaller spoon provides more precision, especially for those with smaller faces, while a larger spoon might be suitable for a more diffused contour.
Adjust the Angle for Face Shape
- Depending on your face shape, you can adjust the angle of the spoon to contour specific areas. Tilt the spoon slightly upwards for a lifted effect or position it more horizontally for a softer contour.
Use the Convex Side for Blending
- After applying contour along the edge of the spoon, flip the spoon and use the convex side to blend the contour into your skin. This technique ensures a seamless transition between the contoured area and the rest of your face.
Contouring the Jawline
- Extend the spoon's edge to your jawline for a well-defined contour. This is especially helpful for creating a sculpted appearance along the jaw and enhancing the definition between the jaw and neck.
Highlight with the Spoon Handle
- While the spoon's edge is great for contouring, the handle can be used to apply a highlighter. Use the straight edge of the handle to apply a light, shimmery powder or cream along the tops of your cheekbones.
Contour the Nose
- For a subtle nose contour, use the edge of the spoon to guide the contour lines on the sides of your nose. Blend carefully for a natural-looking effect.
Clean the Spoon Between Uses
- To prevent mixing contour shades or getting excess product on your face, clean the spoon with a makeup wipe or a damp cloth before switching to a different product.
Practice and Experiment
- Contouring with a spoon might take a bit of practice to get the angles right for your face shape. Experiment with different spoon sizes and angles to find what works best for you.
Set with Translucent Powder
- Once you've applied and blended your contour, set it with a light dusting of translucent powder. This helps to prevent the contour from shifting throughout the day.
Turn Eyeshadow into Eyeliner
- Mix a dark eyeshadow with a few drops of saline solution or water to create a custom eyeliner. Use Otis Batterbee's Angled Detail Brush found in The Mini Eye Brush Set to apply it along your lash line.
Additional Tips:
Eyeshadow Palette Versatility
- Explore different shades in your eyeshadow palette to create custom eyeliners that complement your eye look. This allows you to coordinate your eyeliner with your eyeshadow or outfit.
Adjusting Intensity
- Control the intensity of your custom eyeliner by adjusting the amount of eyeshadow and the liquid medium. For a more subtle look, use less eyeshadow or more solution, and for a bolder line, use more eyeshadow or less solution.
Setting with Powder
- To enhance the longevity of your DIY eyeliner, set it with a matching powder eyeshadow. Using the same shade in powder form helps lock in the liquid eyeliner, preventing smudging.
Experiment with Colour Mixing
- Mix different eyeshadow colours to create unique eyeliner shades. This is a great way to customize your look and experiment with unconventional eyeliner colours.
Use a Sealable Container
- If you plan to create a larger quantity of custom eyeliner, mix the eyeshadow and liquid in a small, sealable container. This allows you to store the mixture for future use without it drying out.
Mix on a Palette
- Instead of mixing directly in the eyeshadow pan, use a palette or the back of your hand to create the eyeliner mixture. This prevents contaminating the entire eyeshadow pan and allows for easier mixing.
Clean Angled Brush Regularly
- Since you're using the angled brush for both eyeshadow and eyeliner application, clean it regularly to avoid colour contamination and maintain precise application.
Layering for Intensity
- If you desire a more intense colour, apply the custom eyeliner in layers. Allow each layer to dry before adding the next, gradually building up the colour to your desired intensity.
Winged Eyeliner with Precision
- The angled brush is excellent for creating a winged eyeliner look. Use the angle of the brush to guide the flick, and then fill in the line for a classic winged effect.

Broken Powder Makeup with Rubbing Alcohol
- If your powder makeup (blush, eyeshadow, etc.) breaks, don’t throw it away. Instead, add a few drops of rubbing alcohol and press the powder back together with a spoon. Let it dry for a few hours.
Additional Tips:
Choose the Right Alcohol Content
- Opt for a high percentage of rubbing alcohol (70% or higher) to ensure effective binding. The higher alcohol content evaporates more quickly, leaving your makeup dry and intact.
Gradual Alcohol Addition
- Add rubbing alcohol to the broken powder makeup gradually. It's easier to add more if needed than to deal with an overly wet mixture. You want a consistency that is damp enough to hold together but not too saturated.
Press, Don't Rub
- Use the back of a spoon to press the broken powder back together. Pressing helps the product to compact and adhere properly. Avoid rubbing or swirling, as this may create a gritty texture.
Smooth the Surface
- After pressing the powder back into place, use the back of the spoon to smooth the surface. This ensures an even and polished finish once the makeup dries.
Allow Sufficient Drying Time
- Be patient and allow the makeup to dry completely before using it again. This usually takes a few hours, but you can leave it overnight for best results. The alcohol needs time to evaporate, leaving the powder in its reformed state.
Sanitize the Spoon
- Before using the spoon to press the makeup, sanitize it with rubbing alcohol or hot water. This prevents any potential bacteria or germs from transferring to your makeup.
Adjusting Colour or Texture
- If the rubbing alcohol alters the colour or texture of the makeup, consider adding a bit more of the original product to balance it out. This is particularly useful if the makeup has lost some pigmentation.
Depotting for Easier Mixing
- If the makeup is in a compact, consider depotting it into a separate container for easier mixing. This allows you to control the alcohol-to-makeup ratio more precisely.
Use a Toothpick for Small Pans
- For smaller pans or intricate designs, use a toothpick instead of a spoon for more precise application of pressure and product smoothing.
Broken Compact? Repurpose the Makeup
- If the compact is beyond repair, consider crushing the broken makeup into a loose powder form. You can repurpose it as an eyeshadow or mix it with clear nail polish to create a custom nail colour.
DIY Tinted Moisturizer
- Mix a few drops of your favorite foundation with your daily moisturizer for a quick and easy DIY tinted moisturizer that evens out your skin tone.
Additional Tips:
Adjust the Ratio for Coverage
- Depending on the level of coverage you desire, you can adjust the ratio of foundation to moisturizer. More foundation will result in higher coverage, while less foundation will give you a sheerer finish.
Use Sunscreen Moisturizer
- For added sun protection, use a daily moisturizer that contains SPF. This way, your DIY tinted moisturizer not only evens out your skin tone but also provides sun protection.
Mix on the Back of Your Hand
- The back of your hand is an excellent mixing palette. Dispense a small amount of foundation and moisturizer, then blend them together with your fingertips before applying to your face.
Apply with Fingers or Makeup Sponge
- Use your fingers for a quick and easy application, or apply the DIY tinted moisturizer with a makeup sponge for a more blended and seamless finish.
Customize with Hydrating Ingredients
- If your foundation is matte or you have dry skin, consider adding a drop of facial oil or a hydrating primer to the mixture. This enhances the moisturizing properties and gives a dewy finish.
Layer for Additional Coverage
- If you need more coverage in certain areas, you can layer the DIY tinted moisturizer. Apply a thin layer first and then build up in areas that need more coverage.
Mix Multiple Foundation Shades
- If you have multiple foundation shades, mix them to create a custom shade that matches your current skin tone. This is especially useful if your skin tone varies throughout the year.
Set with Translucent Powder
- To set the tinted moisturizer and reduce shine, lightly dust your face with translucent powder. This step is especially useful for those with oily or combination skin.
Spot Concealing
- If you have specific blemishes or imperfections that need more coverage, use a concealer only on those areas after applying the tinted moisturizer. This keeps the overall look natural and fresh.
DIY BB Cream
- To add extra benefits to your DIY tinted moisturizer, mix in a small amount of BB cream or a product with skincare benefits. This can include ingredients like antioxidants or anti-aging properties.
Store-Bought Mixing Mediums
- Some beauty brands offer mixing mediums specifically designed to mix with foundation for a more sheer or dewy finish. Consider trying one of these products for added customization.
Freeze Your Eyeliner
- Place your eyeliner in the freezer for 15 minutes before sharpening. This helps prevent the tip from crumbling and makes it easier to achieve a precise line.
Additional Tips:
Choose a Quality Sharpener
- Invest in a good quality sharpener designed for eyeliners. A sharp, clean blade ensures a smooth and precise sharpening process, reducing the chances of breakage.
Warm Up the Tip Before Application
- After freezing, let the eyeliner sit at room temperature for a minute before applying it to your eyes. This helps the product regain its creamy texture, making it easier to apply without tugging on the delicate eye area.
Rotate the Pencil While Sharpening
- When sharpening your eyeliner, rotate the pencil gently to achieve an even point. This ensures that one side of the pencil isn't sharper than the other, allowing for a consistent line during application.
Use a Gentle Hand
- Apply light pressure when sharpening to avoid over-sharpening or breaking the tip. Eyeliner pencils can be delicate, so a gentle touch is key to maintaining their integrity.
Clean the Sharpener Regularly
- Eyeliner residue can accumulate in the sharpener, affecting its performance. Clean the sharpener regularly with a cotton swab or a small brush to keep it in optimal condition.
Check for a Creamy Texture
- Before freezing, check the texture of the eyeliner. If it's already too dry or crumbly, freezing might not fully restore its original consistency. It's best to use this tip as a preventative measure rather than a solution for extremely dry liners.
Avoid Overexposure to Heat
- Store your eyeliner in a cool, dry place when not in use. Exposure to heat over time can contribute to the pencil becoming too soft, making it more prone to breakage during sharpening.
Consider Gel or Twist-Up Eyeliners
- If you frequently encounter issues with traditional pencil eyeliners, consider trying gel eyeliners or twist-up pencils. These types often require less sharpening and maintain a consistent texture.
Reshape with a Warm Spoon
- If your eyeliner does break during sharpening, you can reshape it with the back of a warm spoon. Press the broken pieces together gently and smooth the surface with the warmed spoon for a seamless finish.
Store in a Refrigerator
- For longer-term preservation, consider storing your eyeliners in the refrigerator. The cooler temperature can help maintain the product's integrity over time.
Heat Your Eyelash Curler
- Warm up your eyelash curler with a hairdryer for a few seconds before using it. The heat helps set the curl, giving you long-lasting lifted lashes.
Additional Tips:
Test the Temperature
- Before using the eyelash curler on your lashes, touch it lightly to ensure it's not too hot. You want it to be comfortably warm, not scalding. Safety first!
Curl Before Applying Mascara
- For the best results, curl your lashes before applying mascara. Curling after mascara application can lead to breakage and a less defined curl.
Focus on Sections
- If you have trouble getting your lashes to hold a curl, try curling them in sections. Start at the base of your lashes and pulse the curler gently as you move towards the tips.
Angle Matters
- Angle the eyelash curler upwards slightly to achieve a more natural-looking curl. This prevents lashes from sticking straight out and gives a lifted appearance.
Hold for a Few Seconds
- When curling your lashes, hold the curler at the base of your lashes for a few seconds before moving towards the tips. This allows the heat to set the curl effectively.
Use a Clean Curler
- Make sure your eyelash curler is clean before heating it. Residue from mascara or other products can interfere with the heating process and might transfer onto your lashes.
Invest in a Heated Eyelash Curler
- If you find yourself consistently reaching for the hairdryer, you might consider investing in a heated eyelash curler. These tools are designed specifically to provide controlled heat for curling lashes.
Finish with Waterproof Mascara
- For extra hold, consider finishing your curled lashes with a coat of waterproof mascara. Waterproof formulas are known for their longevity and can help the curl last throughout the day.
Combine with a Lash Primer
- Apply a lash primer before curling your lashes for added volume and hold. Many lash primers also contain conditioning ingredients to keep your lashes healthy.
Avoid Curling Wet Lashes
- Wait until your mascara is completely dry before using the heated eyelash curler. Curling wet lashes can lead to breakage and can affect the curling process.
Clean the Curler Regularly
- Clean your eyelash curler regularly to remove any residue. A clean curler not only performs better but also reduces the risk of eye irritation.
Apply a Face Mask Using a Foundation Brush
- Brush: Otis Batterbee’s Foundation Brush 103
- Hack: Using a foundation brush for applying a face mask can be a convenient and effective way to achieve a smooth and even application.
Additional Tips:
Clean Your Face
- Start with a clean and dry face.
- Get the face mask ready for application. Read instructions to see how to do so.
- Dip the Otis Batterbee Foundation Brush into the product. Make sure to grab enough of the product on the brush.
- Using the Foundation Brush, apply the mask evenly to your face. Start from the center and spread around your cheeks, forehead, nose, and chin. Avoid being too close to your eyes and mouth.
- The Foundation Brush allows for an even distribution of the face mask, ensuring that it's applied equally across your skin. The bristles help smooth the product onto your face, reaching into contours and hard to reach areas for thorough coverage.
- Using a foundation brush can help prevent product wastage. The brush allows you to control the amount of product applied, reducing the likelihood of using more than necessary.
- Foundation brushes are easy to clean, so using one for your face mask application means you can easily wash away any residue after use.
- If you have specific areas on your face that need more attention, such as the T-zone or areas with enlarged pores, a foundation brush allows for precise application in these targeted zones.
- Applying the mask with a Foundation Brush can be more hygienic than applying the mask with your fingers. It minimizes the risk of transferring bacteria from your hands to your face.
- Using a brush can be a neater application method compared to using your fingers, reducing the mess associated with some face masks and avoiding possible exposure to bacteria.

Angled Brush for Lip Contouring
- Brush: Otis Batterbee’s Angled Contour Brush found in The Mini Face Brush Set
- An angled brush is perfect for defining and contouring the lips. Use it to apply a small amount of concealer around the lip line for a crisp, clean look.
Additional Tips:
Choose the Right Brush
- Select Otis Batterbee’s Angled Contour Brush with its firm and luxurious feeling bristles. The angle of the brush will allow for precise application, and firm bristles will help in creating clean lines.
Start with a Clean Canvas
- Begin with clean, moisturized lips. Exfoliate if needed to ensure a smooth surface for application.
Use Concealer
- Apply a small amount of concealer around the edges of your lips to create a clean canvas and highlight the lip shape. This also helps to correct any mistakes and gives a crisp look.
Outline the Lips
- Dip the angled contour brush into your chosen lip liner or lipstick. Start by outlining the natural shape of your lips. Follow the natural contours and use short strokes for precision.
Cupid's Bow
- Pay special attention to defining the cupid's bow. Use the angle of the brush to create a sharp and well-defined V shape.
Connect the Corners
- Extend the lip line from the corners of your mouth to meet the center of the lip outline. This helps in creating a balanced and even lip shape.
Fill in the Lips
- After outlining, use the same angled brush to fill in the lips with your chosen lip colour. The brush allows for controlled application and helps in reaching the corners and edges of the lips.
Blending
- Gently blend the lip liner or lipstick towards the center of the lips using the angled brush. This ensures a seamless transition between the lip liner and the filled-in colour.
Layer for Precision
- If you want a more defined look, you can layer the lip liner or lipstick in thin, precise layers until you achieve the desired intensity.

Detailed Eyeliner Brush for Faux Freckles
- Brush: Otis Batterbee’s Mini Eye Brush Set
- Create faux freckles by using a detailed eyeliner brush to apply a light brown or taupe-coloured product in a natural pattern on your face.
Additional Tips:
Choose the Right Brush
- Opt for Otis Batterbee’s Detailed Eyeliner Brush. The precision and control offered by a detailed brush are essential for creating realistic-looking freckles.
Select the Right Product:
- Use a product that is the right colour for natural-looking freckles. Brown or taupe shades work well for most skin tones. You can use a brow pencil, gel, or even eyeshadow.
Create Variation in Size
- Freckles are not uniform in size or shape. Vary the pressure on the brush to create freckles of different sizes for a more natural appearance.
Consider Placement
- Think about where natural freckles would occur—across the nose, on the cheeks, and sometimes on the forehead. Concentrate on these areas for a believable look.
Use a Light Hand
- Lightly tap the brush onto your skin. Faux freckles should look subtle, so avoid pressing too hard. The key is to create a soft, diffused effect.
Build Gradually
- Start with a few freckles, and gradually add more until you achieve the desired look. This allows you to control the density and avoid overdoing it.
Blend with a Sponge or Finger
- After applying freckles, lightly tap a makeup sponge or your fingertip over them to blend them into your skin for a more natural appearance.
Use Multiple Shades
- To mimic the natural variation in freckle shades, use a couple of different shades of brown or taupe to create a more realistic effect.
Set with Powder
- After applying freckles, set your makeup with a translucent setting powder to ensure that the freckles stay in place throughout the day.
Pair with Minimal Makeup
- Faux freckles look best when paired with minimal makeup. Keep the rest of your makeup subtle to let the freckles stand out.
Experiment with Placement
- Freckles can be placed not only on the nose and cheeks but also on other areas of the face. Experiment with placement to find what looks most natural on your skin.
Baking With Powder
- Product: Otis Batterbee’s Powder Puff Duo
- “Baking” with concealer and powder is a makeup technique that involves setting your concealer with a generous amount of loose powder, allowing it to sit on your face for a few minutes before brushing away the excess. This helps to set the concealer, highlight the under-eye area, and create a long-lasting, flawless finish.
Additional Tips:
Choose the Right Concealer
- Start with a concealer that is one or two shades lighter than your skin tone. This will conceal dark circles and brighten up under-eye areas.
Hydrate the Under-Eye Area
- Before applying concealer, make sure the under-eye area is well-hydrated. Use an eye cream or moisturizer to prevent the concealer from looking dry or settling into fine lines.
Apply Concealer in a Triangular Shape
- Use the concealer to create a triangle shape under your eyes using The Foundation Brush, with the base along your lower lash line and the point toward your cheek. This shape not only conceals dark circles but also highlights the center of your face.
Blend the Concealer
- Use The Concealer Brush to blend the concealer into your skin. Ensure that it's seamlessly blended for a natural look.
Choose a Loose Setting Powder
- Opt for a translucent or light-coloured loose setting powder. Loose powders work well for baking because they set the concealer without adding too much extra colour.
Apply Powder Generously
- Use The Powder Puff Duo to apply a generous amount of loose powder over the concealed areas. Allow the powder to sit on your skin for about 5-10 minutes. The heat from your skin will help set the concealer.
Set Other Areas
- While your under-eye area is "baking," you can also apply a light layer of powder to set other areas of your face where you've applied concealer, like the T-zone.
Brush Away Excess Powder
- After letting the powder sit, use a fluffy makeup brush to gently brush away the excess. This step helps to remove any excess powder and prevents a heavy, cakey finish.
Avoid Over-Baking
- Be cautious not to leave the powder on for too long, especially if you have dry skin, as it can emphasize dryness. Adjust the baking time based on your skin type.

Create Nail Polish Designs
- Brush: Otis Batterbee’s Eyeliner Brush found in The Total Face Makeup Brush Set
- Use a thin eyeliner brush to create intricate designs with nail polish. This is especially handy for drawing lines or creating small details.
Creating the Designs
- Dip The Eyeliner Brush in the coloured Nail Polish of your choosing. This makeup brush allows for precision and control.
Simple Stripes
- Use a thin eyeliner brush to create clean and straight stripes on your nails. You can go for a single stripe across each nail or create a striped pattern for a modern look.
Polka Dots
- Dip the eyeliner brush into your chosen nail polish colour and create perfect polka dots on your nails. You can arrange them randomly or create a pattern for a playful design.
Floral Patterns
- Draw delicate flowers on your nails using the eyeliner brush. You can create petals, leaves, and stems to make a beautiful floral pattern.

Redefine Your Beauty Regime
In the pursuit of beauty, the right tools can make all the difference, and Otis Batterbee's brush collection stands as a testament to this truth. From simplifying everyday makeup routines to enabling the creation of intricate designs, our brushes elevate the art of self-expression. So, embrace the precision, versatility, and elegance that these brushes offer, and let your beauty routine become an art form that reflects your unique style and personality!